如您所知,GitHub 存储库每天都会有数百个新增内容。 但是,许多好的项目被忽视了,也从未得到应有的关注。 今天,我偶然发现了一个很酷的项目,名为 拉姆鲁特. 使用 Ramroot,我们可以完全从 RAM 运行 Arch Linux! 是的,你没有看错。
Ramroot 在系统启动时将整个根文件系统加载到 RAM 中。 它是专为 Arch Linux 设计的。 我在 Ubuntu 中尝试过,但没有成功。 我希望开发人员也能在其他 Linux 发行版上工作。
内容
使用 Ramroot 从 RAM 运行 Arch Linux
Ramroot 可用于 金子,因此您可以使用任何 AUR 帮助程序安装它,例如 肺 或者 耶.
$ Paru -S ramroot
或者,
$ yay -S ramroot
然后,使用命令启用 Ramroot:
$ ramroot enable
样本输出:
:: Detected root UUID: 6517af02-68e9-484e-9dae-f0ed61822ad3 :: No /boot UUID detected. :: zram added to mkinitcpio.conf MODULES :: ext4 added to mkinitcpio.conf MODULES :: vfat added to mkinitcpio.conf MODULES :: ramroot added to mkinitcpio.conf HOOKS :: Enabling ramroot... [sudo] password for sk: ==> Building image from preset: /etc/mkinitcpio.d/linux.preset: 'default' -> -k /boot/vmlinuz-linux -c /etc/mkinitcpio.conf -g /boot/initramfs-linux.img ==> Starting build: 4.17.6-1-ARCH -> Running build hook: [base] -> Running build hook: [udev] -> Running build hook: [ramroot] -> Running build hook: [autodetect] -> Running build hook: [modconf] -> Running build hook: [block] -> Running build hook: [filesystems] -> Running build hook: [keyboard] -> Running build hook: [fsck] ==> Generating module dependencies ==> Creating gzip-compressed initcpio image: /boot/initramfs-linux.img ==> Image generation successful ==> Building image from preset: /etc/mkinitcpio.d/linux.preset: 'fallback' -> -k /boot/vmlinuz-linux -c /etc/mkinitcpio.conf -g /boot/initramfs-linux-fallback.img -S autodetect ==> Starting build: 4.17.6-1-ARCH -> Running build hook: [base] -> Running build hook: [udev] -> Running build hook: [ramroot] -> Running build hook: [modconf] -> Running build hook: [block] ==> WARNING: Possibly missing firmware for module: wd719x ==> WARNING: Possibly missing firmware for module: aic94xx -> Running build hook: [filesystems] -> Running build hook: [keyboard] -> Running build hook: [fsck] ==> Generating module dependencies ==> Creating gzip-compressed initcpio image: /boot/initramfs-linux-fallback.img ==> Image generation successful :: ramroot enabled.
如果由于任何原因它不起作用,请从 GitHub 存储库中获取 Ramroot 二进制文件并按照如下所述运行它。
Git 使用以下命令克隆 Ramroot 存储库:
$ git clone https://github.com/arcmags/ramroot.git Cloning into 'ramroot'... remote: Counting objects: 94, done. remote: Compressing objects: 100% (52/52), done. remote: Total 94 (delta 41), reused 82 (delta 32), pack-reused 0 Unpacking objects: 100% (94/94), done.
上述命令将在当前工作目录中创建一个名为“ramroot”的文件夹,并将 Ramroot 项目的所有内容保存在其中。
然后,去拉姆鲁特 bin 目录:
$ cd ramroot/bin/
使以下文件成为可执行文件:
$ chmod +x ramroot-build $ chmod +x ramroot-enable
最后,运行以下命令启用 Ramroot。
$ ./ramroot-enable
Enter 你的 sudo 或者 root 提示时输入密码。
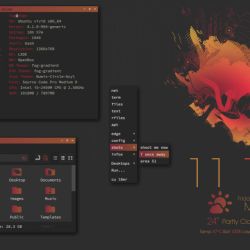
现在,重新启动系统。 在启动过程中,系统会提示您将文件系统加载到 RAM 中。 类型 “是的” 继续。
将根文件系统加载到 RAM
请注意,此提示 (y/N) 默认为 是的 如果有 15 秒超时 4G 或更多的 RAM 被检测到。 因为,我有 2GiB RAM,所以我必须输入 “是” 接着说。
等待一段时间以完成加载过程。 将整个根文件系统加载到 RAM 需要几分钟。 确保您的系统上安装了足够的 RAM。
如果您想保持更快的 RAM 同步时间,请尝试保持干净和精简的系统。 删除旧的和不必要的包,并保持你的包缓存文件夹干净。
更新:
如果您使用最新的 Ramroot 版本, 安装的 RAM 大小应至少比根文件系统的大小大 500MB. 如果 RAM 比文件系统的大小至少多 500MB,则会提示用户将根文件系统加载到 RAM。 如果根文件系统的大小小于安装的内存,最新的 Ramroot 版本将不会在您的 RAM 中加载根文件系统。 它甚至不会提示您是否应该将文件系统加载到 RAM 中。 文件系统将自动挂载到您的本地磁盘,Arch Linux 将正常启动。
将根文件系统加载到 RAM 后,您将进入 rootfs 迅速的。 请注意 重启后什么都不会保存. 因为我们的 Arch Linux 完全从 RAM 加载,而不是从本地磁盘加载。